Sound Strip
A Sound strip plays audio from an external audio file or from an audio stream contained within a movie file.
Sound strips reference the original media rather than embedding it in the blend-file, allowing changes made in external audio editing software to be reflected by simply reloading the file.
Multiple Sound strips can be layered to create a complete soundtrack, including dialogue, music, ambience, and sound effects. During playback and rendering, overlapping Sound strips are mixed together.
To add a Sound strip, choose and select one or more audio files in the File Browser.
If an imported file contains multiple audio streams, Blender creates a separate Sound strip for each stream. The strips are automatically synchronized to match the timing stored in the source file.
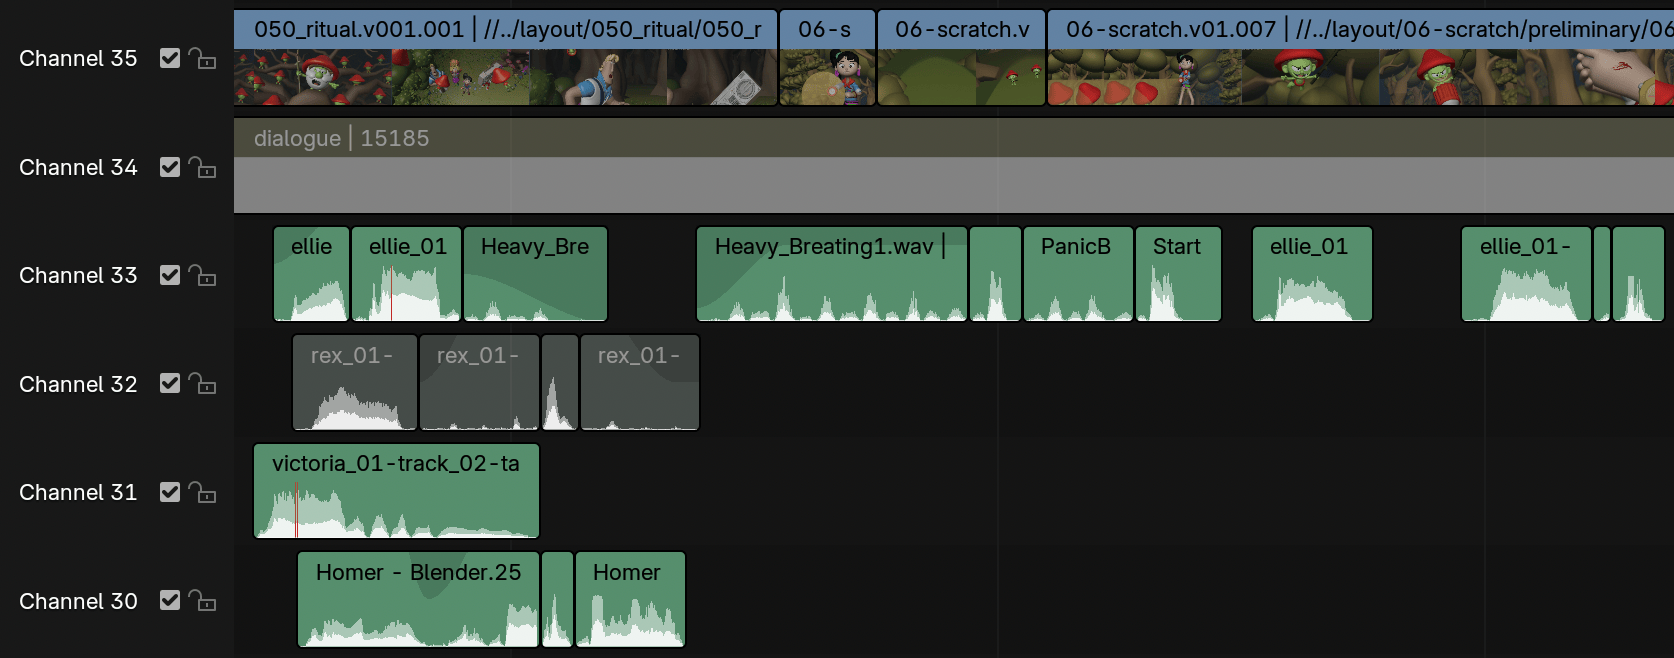
Example of sound editing.
Working with Audio Tracks
A Sound strip behaves like any other strip in the Video Sequencer. You can select and move it, adjust its starting offset by dragging its handles, and split it with K.
Each strip has independent properties such as volume and name, allowing dialogue, music, ambience, and sound effects to be mixed separately.
Overlapping Sound strips are automatically mixed together during playback and rendering. Unlike image and movie strips, lower channels do not obscure higher ones, making the Sequencer a multi-track audio mixer.
See also
In the Playback menu of the Timeline you will find some options concerning audio playback behavior.
Waveform
The waveform of the audio is shown depending on two options:
- Overlay
The Sequencer Overlay menu has options to show all strip wave-forms, none of them, or to use the per-strip option described below.
- Strip
Each strip has an option Display Waveform. It is only visible when the above overlay option is set to Use Strip Option.
Clipping audio, i.e. values over 100% amplitude, will be shown in red in the waveform.
More strip options are documented in Sound Sidebar Panel.
Animating Audio Track Properties
To animate Sound strips simply hit I over any of its values. Examples of animating an audio strip are to fade in/out background music or to adjust volume levels. Layered/crossed Sound strips are added together; the lower channel does not override and cut out higher channels (unlike image and video strips). This makes Blender an audio mixer. By adding audio tracks and using the curves to adjust each tracks sound level, you have an automated dynamic multi-track audio mixer!
See also
Sounds can be cross-faded by adding a Sound Crossfade effect.
Output
There are two ways to render out your audio. You can either have it encoded with a video file or in its own audio file. Read more on how to select a proper audio format and how to start rendering.
Add Sound Strip
Reference
- Menu:
- Move Strips
Use mouse to position strip in timeline immediately after adding. If this option is enabled, Start Frame and Channel properties are not displayed.
- Start Frame
The Start Frame to place the left handle of the strip.
- Channel
The Channel to place the strip.
- Relative Path
Store the location of the image file relative to the blend-file.
- Replace Selection
Replaces the currently selected strips with the new strip.
- Cache
Cache the sound in memory, enables Caching in the Source properties.
- Mono
Merge all sound channels into one channel, enables Mono in the Sound properties.